Thicknesses |
  
|
Thicknesses |
|
Create (or Modify) > Shell Properties > Thicknesses prompts you with the following dialog.
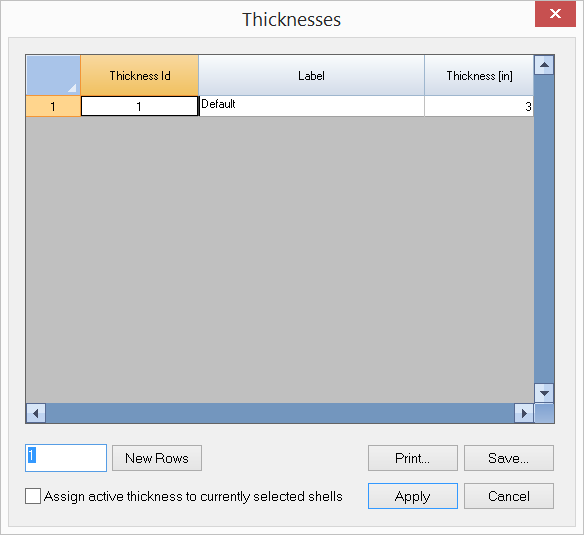
It allows you to define and/or assign thicknesses to selected shells in the model. An ID is assigned automatically to each thickness by the program and may not be changed. You may assign a label with 127 maximum characters to each thickness for easy identification. The thickness properties include thickness only.
You may add one or more thicknesses by clicking the “New Rows” button. You may also print all thicknesses in the list by clicking the “Print” button. The “Assign active thickness to currently selected shells” checkbox may be used to assign the active thickness to selected shells. The active thickness refers to the one that currently has focus in the list in the dialog. In order for thickness assignments to take place, shells must be selected beforehand.
A more flexible way to assign shell properties is to use Modify > Shell Properties command, which allows you to continuously assign one or more properties to shells.
The program always has a default thickness labeled “Default”. You may not delete this thickness or change its label. You may, however, change its properties.
 <
<