Settings |
  
|
Settings |
|
The Settings item in the main menu provides access to several selections that control how various aspects of ENERCALC SEL operates.
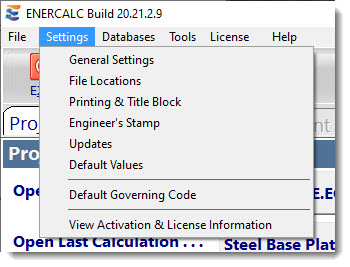
A selection of one of the first five items will open the Program Settings window and preselect the appropriate tab for the chosen item.
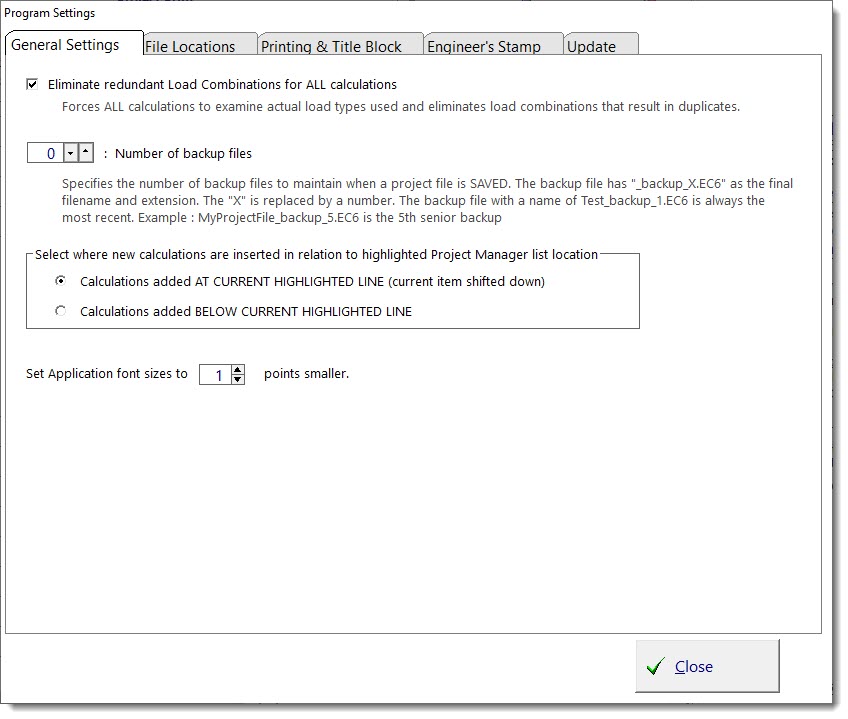
Eliminate redundant Load Combinations for ALL calculations: With this box checked the software will only run load combinations that are unique. It will automatically eliminate any load combinations that result in a combination that is redundant.
Number of backup files: Specifies the number of backup files to maintain for each Project File. When the number is set to anything greater than zero, the software will automatically create a backup file with _backup_[n].ec6 appended to the file name, in the same folder as the original Project File. The zero setting is provided under the presumption that the user has another backup system in place that they trust to protect their work, therefore automatic backups are set to 0 to avoid unnecessary redundancy. The backup files are created when a Project File is CLOSED.
Select where new calculations are inserted...: This applies to the way calculations are inserted when using the Project Manager.
•When the first option is selected and you use the [+Add] button, it adds a new calculation to the project, and the calculation is inserted at the currently highlighted location (currently highlighted item is shifted down).
•When the second option is selected and you use the [+Add] button, it adds a new calculation immediately below the currently highlighted location.
Set Application font sizes to X points smaller: Provides a way to scale fonts down, for high resolution displays.
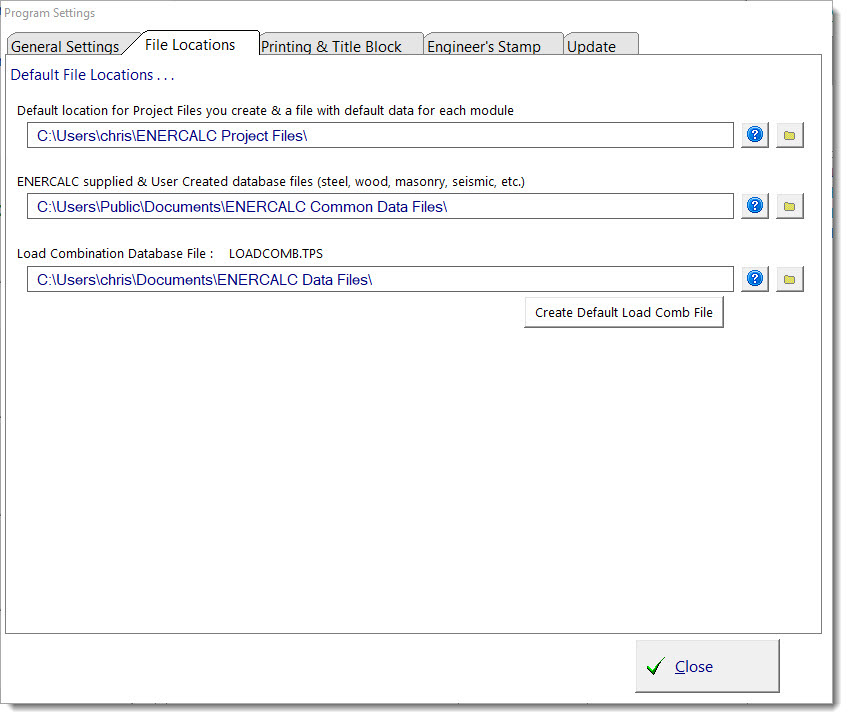
Because modern operating systems allow multiple users per computer, Microsoft suggests that software manufacturers create their own folder under Documents and set that as the default location for user-created files. The program conforms to this recommendation by suggesting an appropriate directory during the installation process.
Default Project File Location: Specifies the default location where the program will point when using File > Open or File > New from the main menu.
Database File Location: Specifies where the program should look for the steel database, wood database, and other files that contain the databases of standard values. This location needs to be accessible to all users on a specific computer. Microsoft suggests that software manufacturers set the following as the default location for data files that are referenced by the software, but not modified by the user: C:\Users\Public\Documents.
Load Database File Location: Specifies where the program should look for the load combination database file and other files that are potentially edited by the user. Because this is a file that can be customized by the user, the default location for this file is the same as the default location offered for storing Project Files.
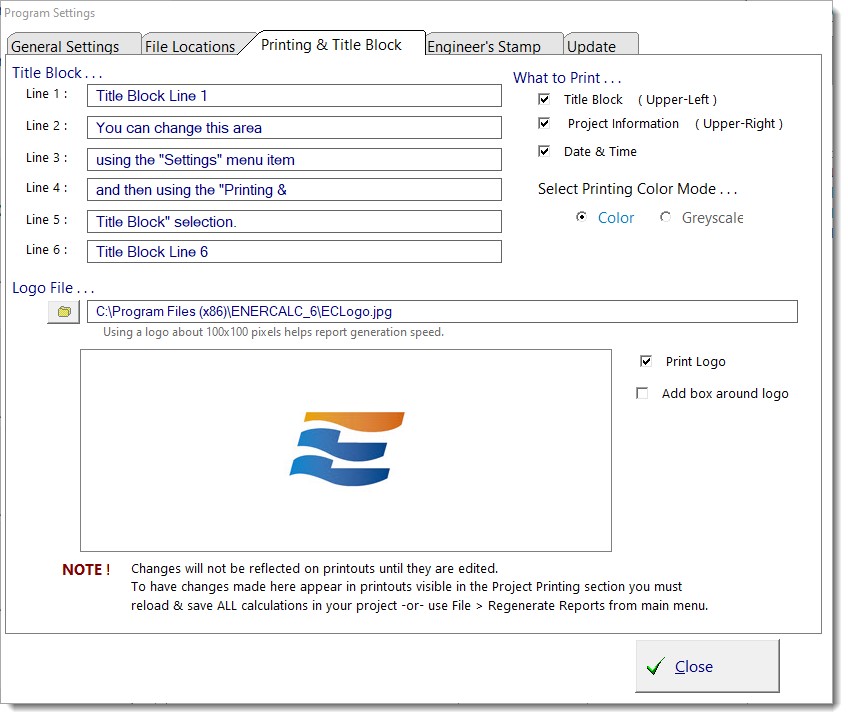
Title Block: These six entries correspond to the six lines in the upper-left corner of the printout.
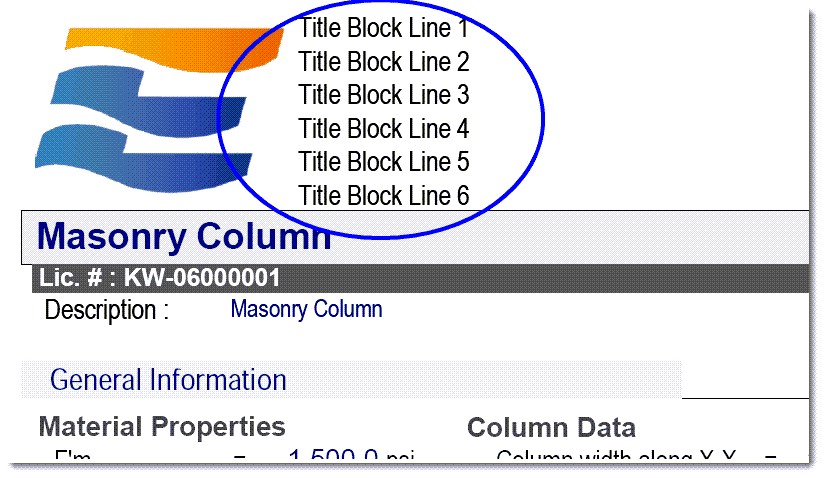
Logo File: Provides an option to specify a graphics file to be printed at the LEFT edge of the title block. If used, the six lines of Title Block information will be printed immediately to the right of the logo. Logos can be JPG or JPEG formats only.
When a logo is specified, the height is adjusted to fit into the title block area and the right-side "floats" according to the width of the image.
What to Print - Title Block: Check this box to print the title block at the top left of the report. With this item unchecked the printout begins with the calculation title bar (shown as "Masonry Column" in the image above)
What to Print - Project Information: Check this box to print the Project Information at the top right of the report.
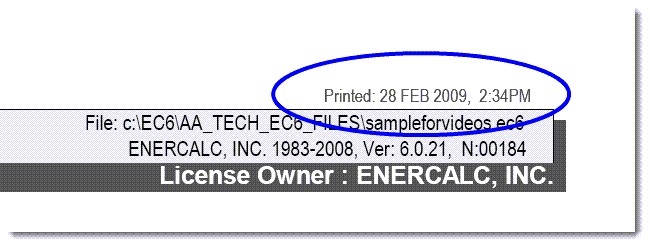
What to Print - Date & Time: Check this box to print the computer date and time on the report as shown below:
Select Printing Color Mode: This sets the default mode for printed reports created from ENERCALC SEL.
This tab allows a graphic image of the user's PE stamp to be uploaded. Then the stamp can be placed on printout by selecting the checkbox.
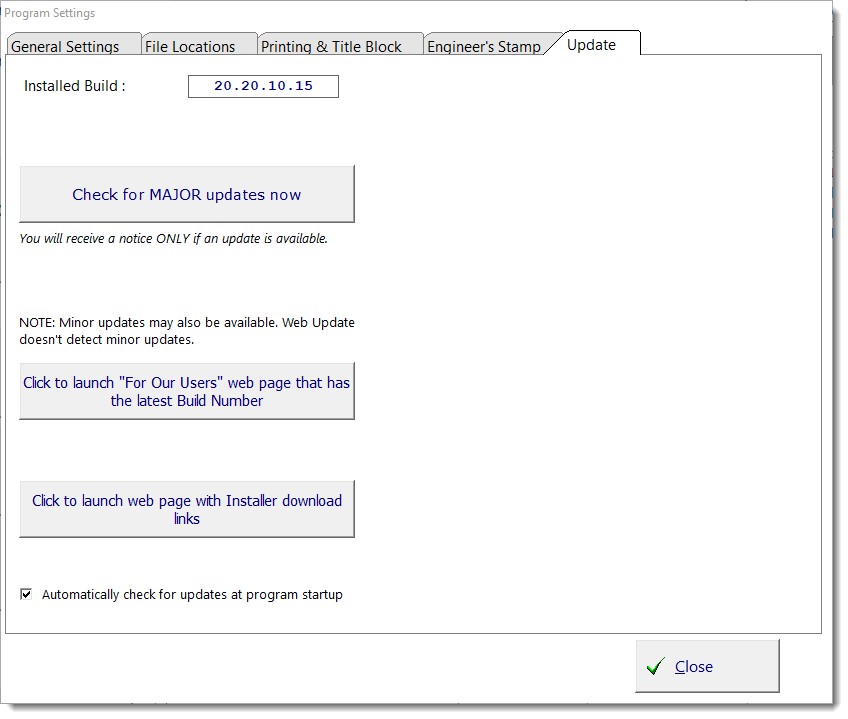
Click here to check for updates: This button will download the updating program from our server. This program will check your computer for a non-expired Maintenance & Support Plan and update the software to the latest version.
 <
<