Importing Calculations |
  
|
Importing Calculations |
|
The Import button is located as shown below:

Clicking the Import button will change the Project Manager screen to appear as shown in the following image.
Please see the descriptions following the numbered keynotes. The order of the notes follows the order of usage.
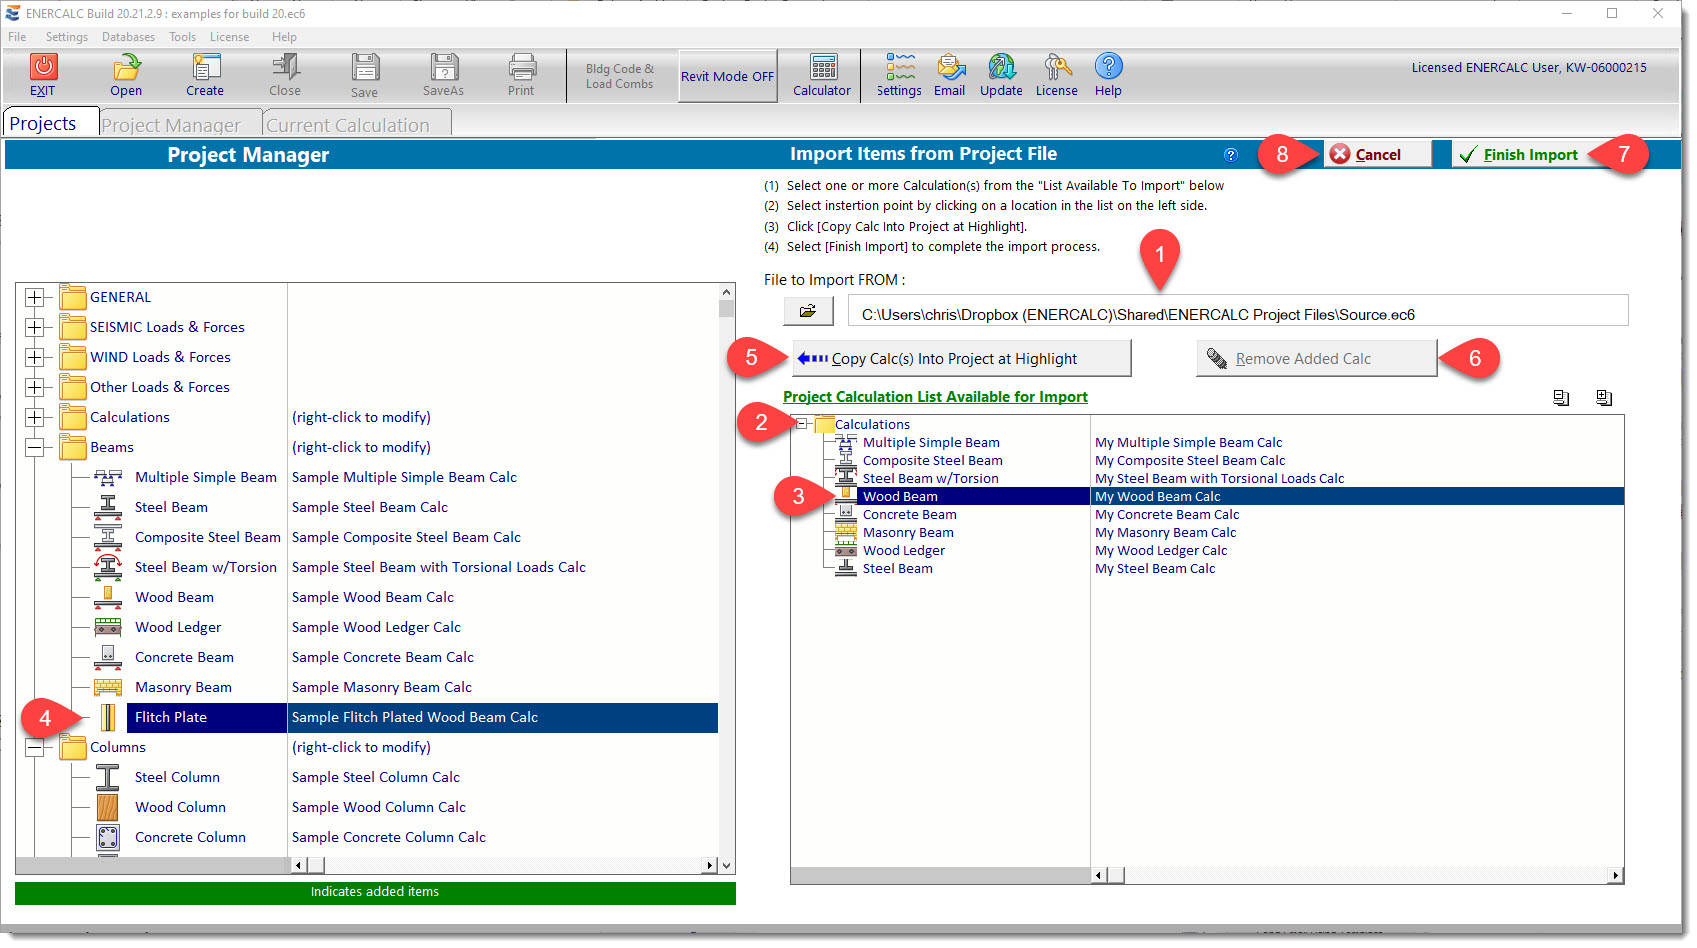
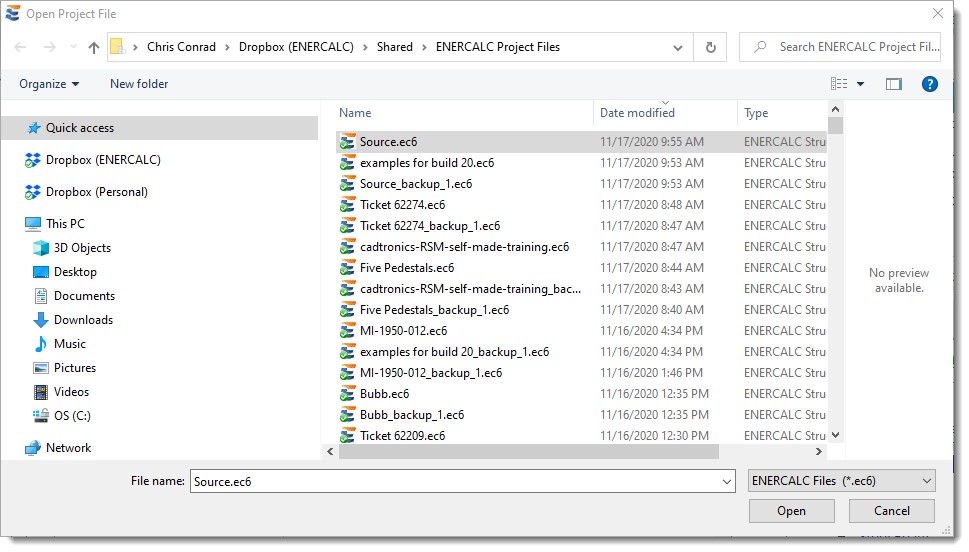
(1) Specify the source ENERCALC Project File from which you will import calculations into the current (destination) Project File.
Clicking the [Select Source File] icon will display a standard Windows File Open dialog:
(2) After identifying the source Project File, area (2) will show the calculations in that source file in a tree-structure list.
(3) Click on the desired calculation in the source file to select it. It will become highlighted.
(4) Click in the current (destination) Project File to highlight a line where the calculation should be imported. (The only restriction is that calculations cannot be imported into the GENERAL Division or the LOADS & FORCES Divisions, so be sure to select a location other than those two Divisions or any of their contents.)
(5) Click the [Copy Calc(s) Into Project at Highlight] button.
Notice in the image below the [Wood Beam] calculation is now highlighted in green in the current (destination) file to indicate the location where it will be inserted.
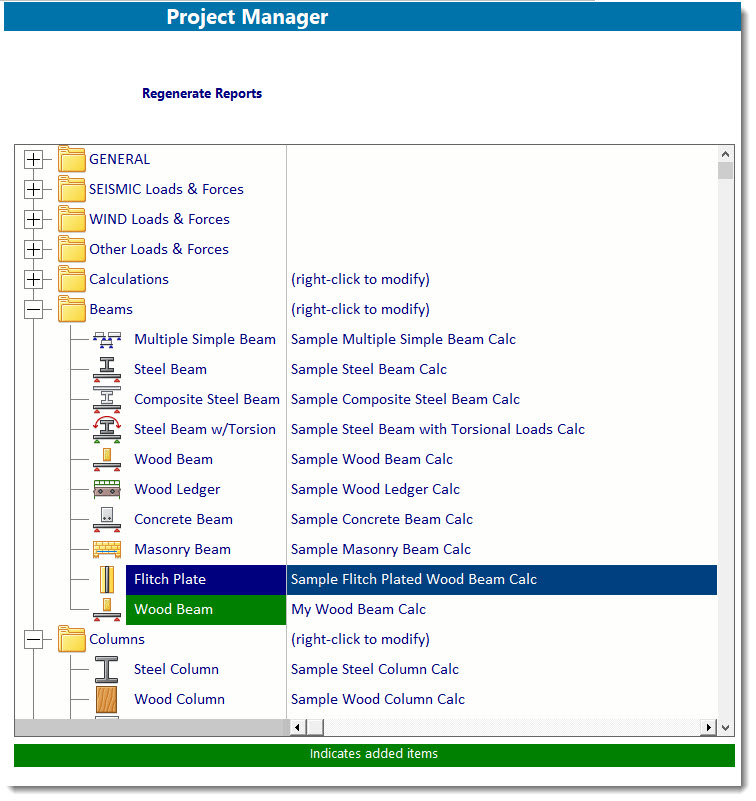
Note: If you made a mistake and want to cancel the selection, just highlight the calculation in green on the left and click the [Remove Added Calc] button (6).
(7) To finish the import process click the ![]() button.
button.
(8) To completely cancel the import click the ![]() button.
button.
 <
<