General Calculation Screen Usage |
  
|
General Calculation Screen Usage |
|
Please refer to the typical screen below and the numbered items that relate screen areas to their descriptions:
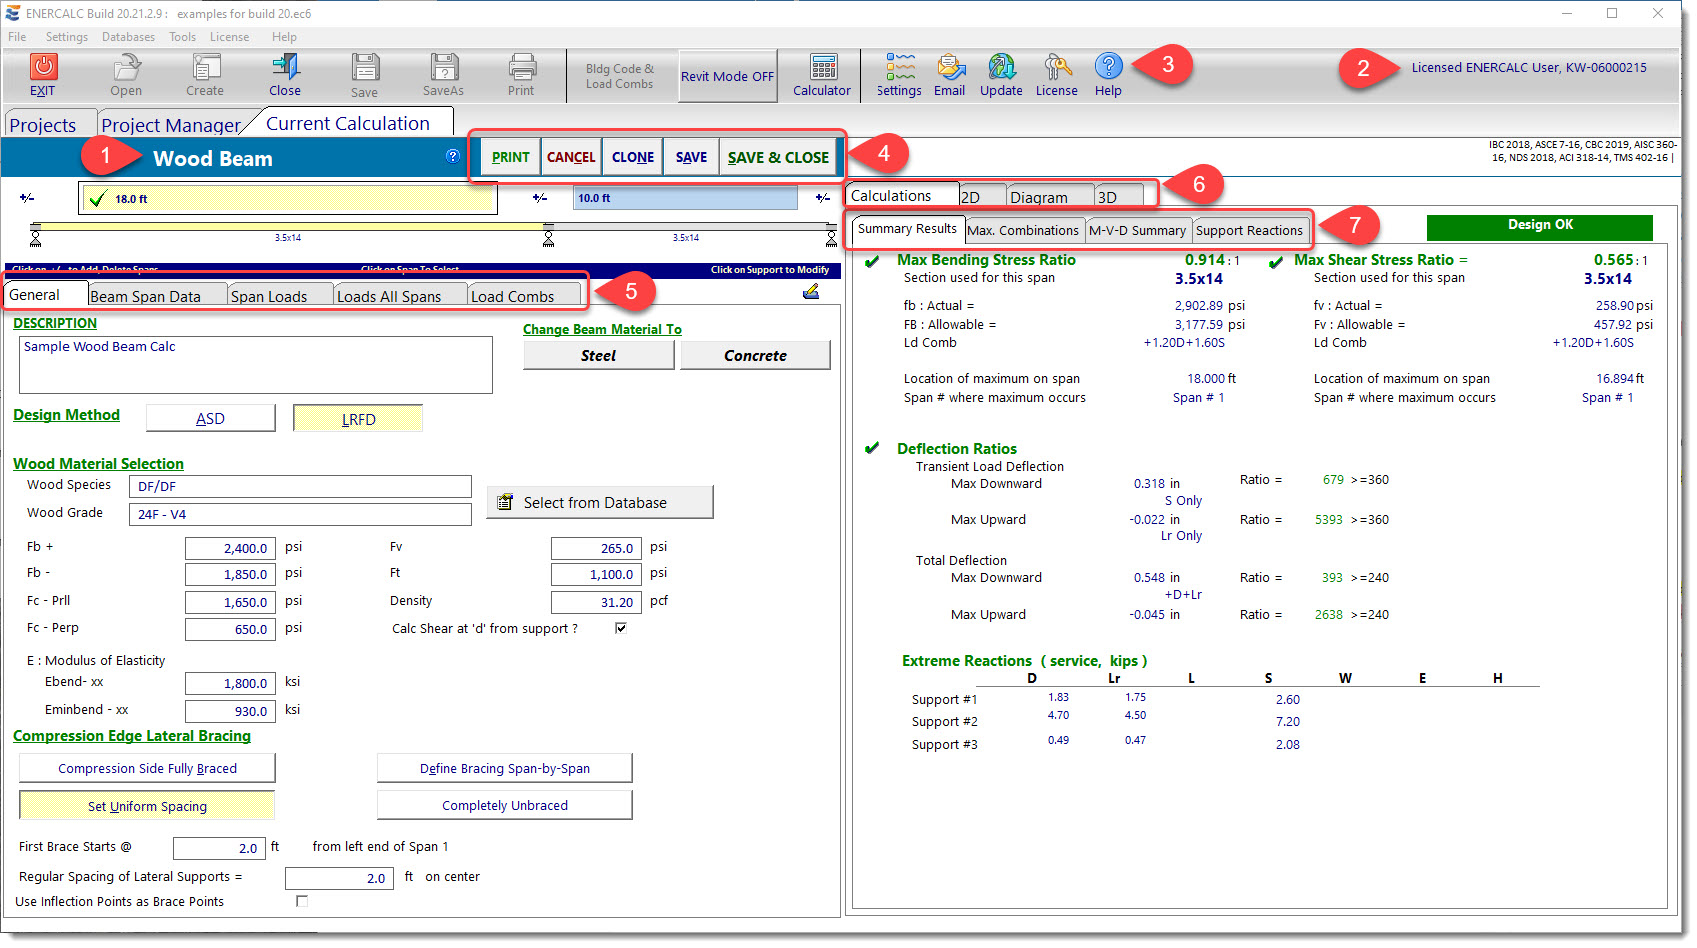
(1) Indicates the module that you are working in.
(2) Indicates the name of the licensed owner of this installation & activation of the software.
(3) Access to help system: Opens the help system and displays the section specific to this module.
(4) From left to right:
Print: Opens the Print Previewer where the report can be set up, previewed, printed to a printer, or printed to PDF.
Cancel: Cancels all changes made to this module since the last save, closes the module without saving, and returns to the Project Manager. If this calculation module was just Added to the Project File, and if it was never saved, then this option will cause the calculation to be removed without saving.
Clone: Uses the current calculation data to create an identical new calculation item in the Project Manager.
Save: Saves the current Project File (to capture all the data entered into this module), creates a report (which can be printed at a later time), and keeps the module open for further editing.
Save & Close: Saves the current Project File (to capture all the data entered into this module), creates a report (which can be printed at a later time), closes the module, and returns to the Project Manager.
(5) Data input tabs: Click these tabs to move to various categories of data input.
(6) Major Result Category Tabs: Select between major categories of result data to view; numerical values, sketches, diagrams or 3D renderings.
(7) Numeric Result Tabs: Click these tabs to view the various components of calculated results.
 <
<